Deploy Your Site from Local Using a Migration Plugin
Deploying your site with a migration plugin is typically more user-friendly than a cPanel migration.
From a birds-eye view, the process is similar in terms of moving your files and your database from your local machine to a remote server, but this method involves a bit more automation.
There are multiple plugins available to handle this type of deployment and a few of the most popular options are All-in-One WP Migration, WP Migrate DB, and Duplicator.
All-in-One WP Migration is one of the most streamlined backup and migration plugins, designed for non-technical users. We’ll use it for our example of deploying a site from Local to a web host.
Here are the steps you’d take for this type of migration.
1. Install the plugin on your Local site and your production site
You’ll use the All-in-One WP Migration plugin both to export your Local site and to import to your destination site.
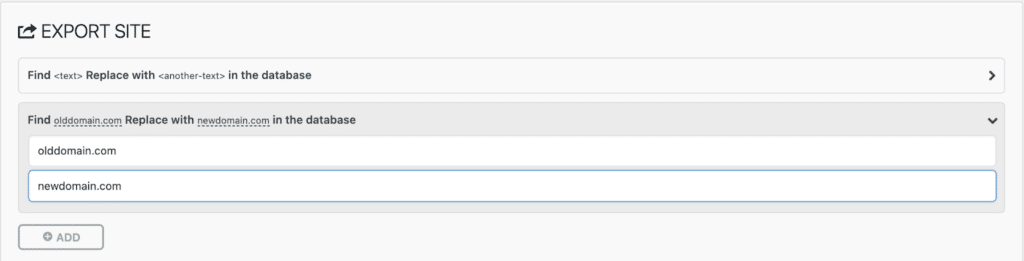
2. Add find/replace rules (optional)
If you want to change your local URL to the remote server URL (or any other find/replace operations in the database), you have the opportunity to do this prior to exporting your site.
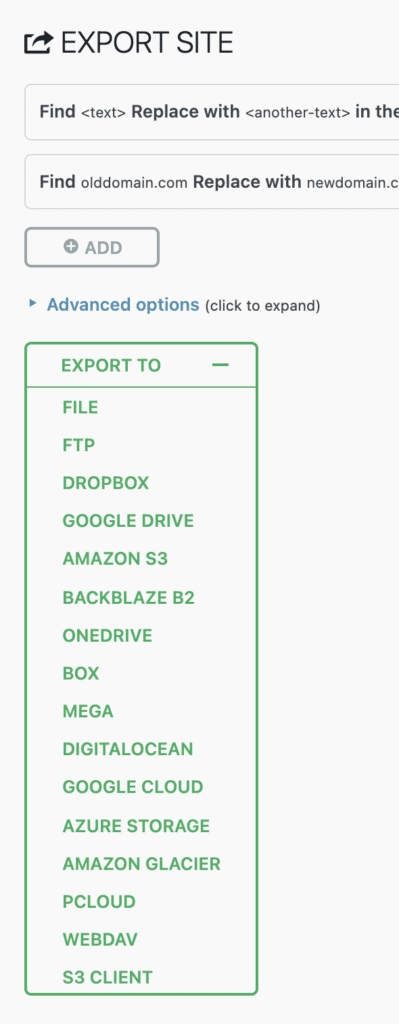
3. Set advanced options (optional)
All-in-One WP Migration also gives you the ability to pick and choose a handful of options that will (or will not be) included in your export. As an example, some of these options include:
- Not exporting spam comments or post revisions
- Not exporting the media library, themes, or plugins
- Not exporting the database at all
4. Create an export file
From the admin of your live site, go to All-in-One WP Migration > Export and create a copy of your site (files and database). With the free version, you can export your site to a file. You’d need to purchase an extension if you wanted to export directly to a third-party service, such as Google Drive or Dropbox.
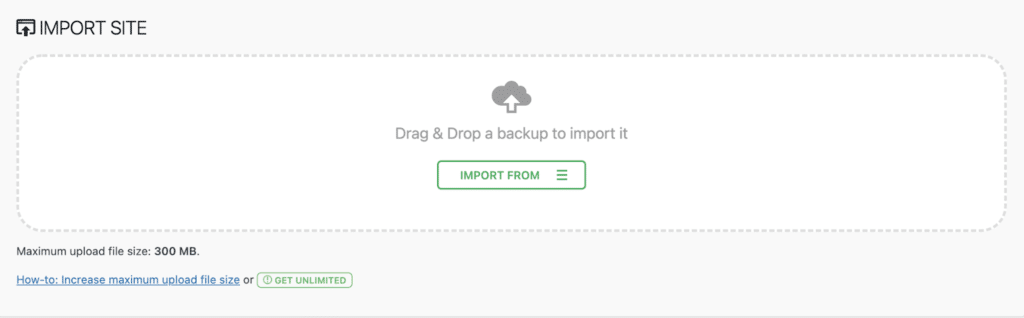
5. Import the site copy on the live site
From the admin of your live site, go to All-in-One WP Migration > Import and drag & drop your exported file. Note that you’re limited to files that are 300MB or less with the free version.
Pros and cons of deploying via All-in-One WP Migration plugin
Before we move on from using migration plugins, let’s highlight some pros and cons.
Pros:
- Works on all hosting providers
- Includes the ability to find/replace your development URL with your live URL as part of the migration process
- Great for small sites
- Great for creating site backups
Cons:
- For additional export options or sites larger than 300MB, you need to pay
- While simpler than using SFTP and a database manager, the process isn’t fully automated
- You may still need to use a plugin on the destination site such as Better Search and Replace to replace URLs stored as serialized data
- You may need to use a plugin such as Regenerate Thumbnails if images do not appear in your media library
- For larger sites with larger databases, you may run into server timeouts when creating the copy of your site